10 Easy Crochet Granny Square Patterns: Step-by-Step
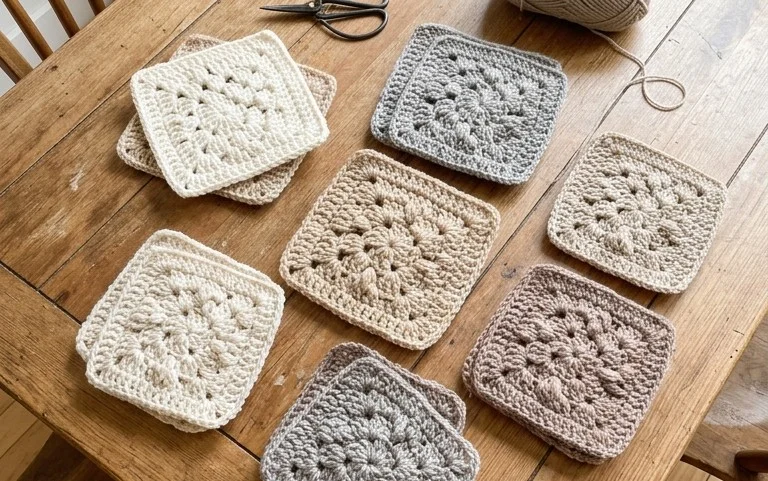
A stack of finished squares resting on a wooden side table represents the cozy potential of these hand-stitched motifs. Each square has a soft, uniform weight that makes them enjoyable to hold while you work through the rounds. These projects suit anyone from a beginner wanting to build confidence to a seasoned gift maker producing quick items for friends. You will appreciate the rhythmic flow of the stitches as they grow from the center outward. By focusing on consistent tension, you will learn to manage chain spaces and cluster heights to create a clean, professional finish on every single piece.
Why You’ll Love This Pattern
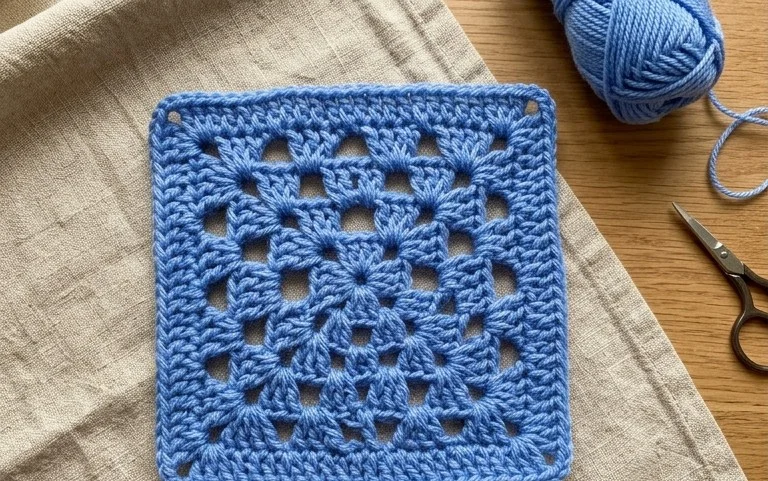
The Classic Crochet Granny Square is the foundation of countless textile projects, from cozy blankets to lightweight summer tops. This version relies on the traditional clusters of double crochet stitches, which create a balanced, geometric aesthetic that remains timeless in home decor. You will find that the repetitive nature of the rounds makes this a perfect project for relaxing after a long day or working while traveling. Because it uses small amounts of yarn per square, it serves as an excellent way to use up leftover bits from larger projects while ensuring a cohesive, colorful stash-buster output.
I finally learned how to keep my corners square using this guide and my blanket is coming along perfectly now that I understand the chain placement.
— Sarah, hobbyist maker
Pattern Overview & Skill Level
- Skill Level: Beginner
- Approximate Time: 30-45 minutes per square
- Construction: Worked in rounds, starting from the center and growing outward
- Finished Dimensions: Approximately 6 inches by 6 inches using worsted weight yarn
Materials & Supplies Needed
- Yarn: Worsted weight (#4), 100% wool or acrylic blend, approximately 25 yards per square.
- Hook Size: 5.0 mm / H-8
- Notions: Tapestry needle for weaving in ends, sharp scissors.
- Safe yarn substitutions: You may use cotton yarn for a stiffer, more structured square, though it will require a slightly tighter tension to maintain the same dimensions. Avoid chunky or super-fine yarns unless you are prepared to adjust the number of rounds to reach your desired size.
Stitch Guide & Abbreviations (US Terms)
- ch = chain
- st = stitch
- sl st = slip stitch
- dc = double crochet
- dc cluster = 3 double crochet stitches worked into the same space
- sp = space (the hole created by the chain stitches in the previous round)
- MR = magic ring
Step-by-Step Pattern Instructions
The Foundation
- Rnd 1: Start with a MR. Ch 3 (counts as first dc throughout). Work 2 dc into the MR, ch 2. Work 3 dc into the MR, ch 2 3 times. Join with a sl st to the top of the beginning ch-3. (12 dc, 4 ch-2 sps).
- Rnd 2: Sl st into the next dc and into the first ch-2 sp. Ch 3, 2 dc into same sp, ch 2, 3 dc into same sp (this forms the first corner). Ch 1, skip 3 dc, (3 dc, ch 2, 3 dc) into the next ch-2 sp 3 times. Ch 1, join with a sl st to the top of the beginning ch-3. (24 dc, 4 ch-2 sps, 4 ch-1 sps).
- Rnd 3: Sl st into the next dc and into the first ch-2 sp. Ch 3, 2 dc into same sp, ch 2, 3 dc into same sp. Ch 1, 3 dc into the next ch-1 sp, ch 1, (3 dc, ch 2, 3 dc) into the next ch-2 sp 3 times. Ch 1, 3 dc into the last ch-1 sp, ch 1, join with a sl st to the top of the beginning ch-3. (36 dc, 4 ch-2 sps, 8 ch-1 sps).
- Rnd 4: Sl st into the next dc and into the first ch-2 sp. Ch 3, 2 dc into same sp, ch 2, 3 dc into same sp. Ch 1, (3 dc into next ch-1 sp, ch 1) across to the corner, (3 dc, ch 2, 3 dc) into the corner sp 3 times. Ch 1, 3 dc into the remaining ch-1 sps, ch 1, join with a sl st to the top of the beginning ch-3. (48 dc, 4 ch-2 sps, 12 ch-1 sps).
Finishing
Fasten off your yarn, leaving a 6-inch tail. Use your tapestry needle to weave the tail through the back of the stitches to secure it. If you plan to join these squares later, leave a longer tail—approximately 12 inches—to facilitate the mattress stitch or single crochet join method.
Care & Washing Instructions
- Hand wash your finished items in cool water with a gentle wool-safe detergent.
- Gently squeeze out excess water by rolling the piece in a dry towel rather than wringing it.
- Lay the square flat on a clean surface to air dry and reshape it while damp to ensure perfectly straight edges.
Pro Tips & Common Mistakes to Avoid
Maintain consistent tension by holding your yarn with a steady, relaxed grip; if your corners start to ripple, your tension is likely too loose, while pulling creates a cup shape. Always place a stitch marker in the first stitch of every round to keep track of where your round begins and ends, which prevents accidentally adding extra stitches. Weave your ends in by running the needle under at least three sets of stitches in opposite directions to prevent them from loosening over time. If you choose to increase the size of the square beyond four rounds, simply repeat the pattern of working (3 dc, ch 2, 3 dc) into the corners and (3 dc) into every side space, which will require roughly 10-15% more yarn per additional round.
Frequently Asked Questions
Can I use a different hook size for this pattern?
Yes, changing the hook size will alter the finished size of your square. A smaller hook results in a tighter, denser fabric, while a larger hook creates a more open, lacy texture.
Is it okay to mix different yarn weights in one project?
Mixing weights is generally discouraged for a uniform blanket. If you must mix them, ensure you adjust your hook size for each yarn to keep the gauge as similar as possible across all squares.
How do I know if I am ready to move on to more complex patterns?
You are ready when you can consistently complete the stitches without looking at the instructions for every step and when your corners naturally stay flat without pulling or ruffling.
Am I allowed to sell blankets made from this pattern?
You are welcome to sell finished items created from this pattern. I only ask that you credit the original design when listing your products online or at craft markets.
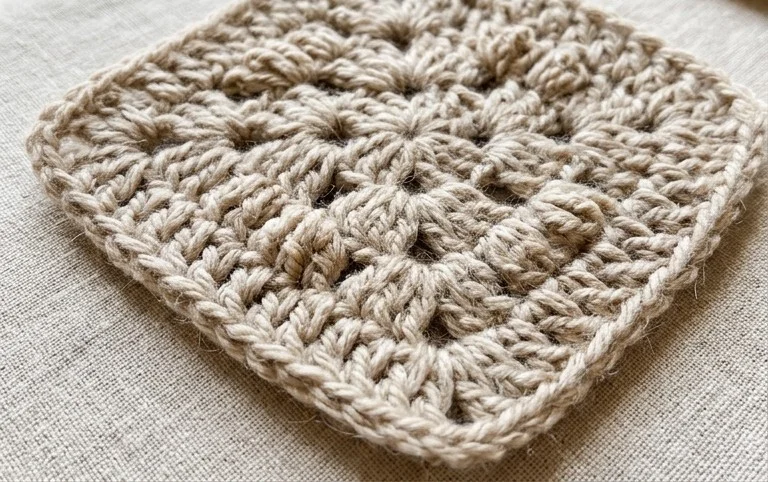
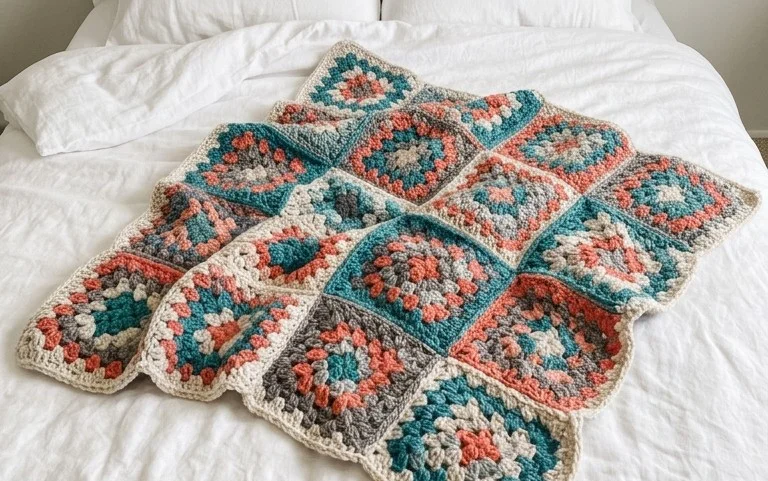
These squares look beautiful joined together as a weighted throw blanket or stitched individually as lightweight coasters for your kitchen. You might experiment with variegated yarns for an unpredictable pop of color or use a thicker cotton cord if you need a sturdy pot holder. Posting a clear photo of your finished work helps other makers see how different combinations come together in practice. You can find more free instructions and project ideas in the archives of this site to keep your hook moving all year long.