Easy Flower Motifs: Step-by-Step Crochet Join Tutorial
Soft cotton petals create a light, floral texture that sits flat on any surface. These small units feel substantial in your hand and work up quickly, making them a great project for using yarn leftovers or building a collection of handmade home accessories. Beginners will appreciate how the systematic rounds build a clear shape without any complicated counting, while experienced makers will enjoy the meditative rhythm of creating multiple identical pieces. You will learn the precise method for connecting these motifs into a seamless fabric using a simple joining stitch that remains nearly invisible once the project is blocked and fully assembled.
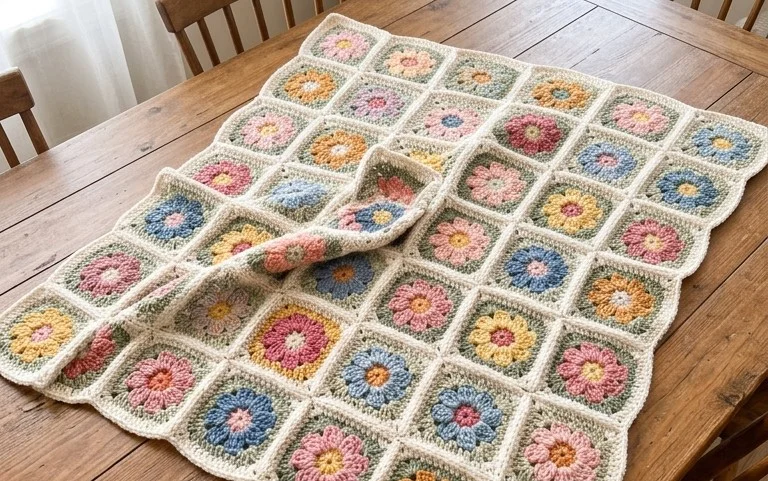
Why You’ll Love This Pattern
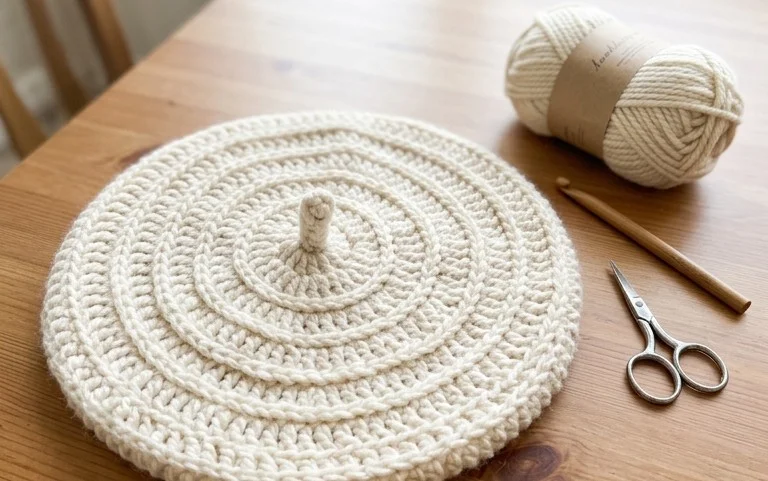
This beginner-friendly crochet coaster pattern provides a quick and satisfying way to use up those small leftover balls of cotton yarn. Because it uses simple stitches, you can finish a full set of four in a single afternoon, making them an ideal choice for last-minute housewarming gifts or quick market inventory. The dense, circular construction ensures your surfaces remain protected from condensation and heat, while the flat design lays perfectly level without curling at the edges. Since the pattern relies on a basic flat circle expansion method, it serves as a reliable introduction to understanding how stitches behave in rounds.
I managed to whip up a matching set of six in an evening while watching a show. The instructions are very easy to follow and they look professional on my coffee table.
— Sarah, casual crafter
Pattern Overview & Skill Level
- Skill Level: Beginner
- Approximate Time: 30 minutes per coaster
- Construction: Worked in continuous rounds, starting from a magic ring and expanding with systematic increases
- Finished Dimensions & Sizing: 4 inches in diameter
Materials & Supplies Needed
- Yarn: Worsted weight #4, 100% cotton, approximately 15 yards per coaster. Cotton is necessary for heat resistance and absorbency.
- Hook Size: 5.0 mm (H-8)
- Notions: Tapestry needle for weaving in ends, one stitch marker to track the start of rounds.
- Safe yarn substitutions: Acrylic yarn is a common substitute, but keep in mind that it will not absorb moisture effectively and may melt if placed under a very hot mug. Wool is also suitable, but ensure it is superwash to allow for easier cleaning.
Stitch Guide & Abbreviations (US Terms)
- MR: Magic Ring
- ch: Chain
- sc: Single crochet
- inc: Increase (work 2 sc in the same stitch)
- sl st: Slip stitch
- st(s): Stitch(es)
Step-by-Step Pattern Instructions
This coaster is worked in one piece. You will use a stitch marker to keep track of the start of each round, moving it up as you progress.
Coaster Body
- Rnd 1: Start with a MR, work 6 sc into the ring. Tighten the tail to close the hole (6 sts).
- Rnd 2: Work 2 sc in each st around (12 sts).
- Rnd 3: [1 sc, inc] 6 times (18 sts).
- Rnd 4: [2 sc, inc] 6 times (24 sts).
- Rnd 5: [3 sc, inc] 6 times (30 sts).
- Rnd 6: [4 sc, inc] 6 times (36 sts).
- Finishing: Join with a sl st to the first sc of the round. Cut the yarn, leaving a 6-inch tail. Pull the tail through the loop and tighten. Use the tapestry needle to weave the tail into the back of the work to secure it.
Care & Washing Instructions
- Machine wash on a gentle cycle in cold water using mild detergent.
- Reshape the coaster while damp and lay it flat on a towel to air dry.
- Avoid using fabric softener, as it reduces the absorbency of the cotton fibers.
Pro Tips & Common Mistakes to Avoid
Maintain consistent tension throughout the project to ensure the coaster remains perfectly flat; if your stitches are too tight, the circle will cup upward like a bowl. Always use a stitch marker at the beginning of each round to avoid losing your place, especially when working on multiple projects at once. Weave your yarn ends into the back side of the stitches using a tapestry needle to ensure they stay hidden and secure even after repeated washing. If you wish to make a larger coaster, continue the increase pattern by adding one more sc between each inc in every subsequent round, though you may need a slightly larger hook to maintain the drape.
Frequently Asked Questions
Can I use a larger hook for this pattern?
Using a larger hook will result in a slightly larger coaster with more space between the stitches. This can create a lacy effect, but keep in mind that the coaster will provide less protection for your table surface.
Is this pattern suitable for complete beginners?
Yes, this is an excellent first project. It covers the essential skills of working in the round, increasing, and finishing, all while using the most basic stitch in crochet.
How do I prevent the center hole from opening up?
Pull the tail of your magic ring very firmly before weaving it in. You can also sew the center closed with your tapestry needle after the coaster is finished to ensure it remains tight.
Am I allowed to sell coasters made from this pattern?
You are welcome to sell items made from this pattern as long as you provide credit to the designer. Do not redistribute or sell the written pattern itself.
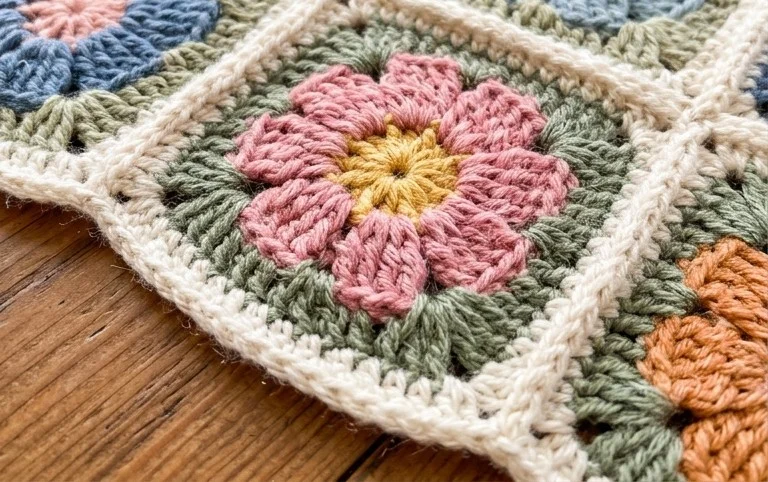
Connecting these individual blossoms creates a final piece that feels dense yet flexible, providing a finished project that stands up well to daily use on a side table or mantel. Try alternating between two contrasting colors to make the petal shapes pop against each other, or increase the hook size by one millimeter to create a larger, drapier version. Post a photo of your finished work on your favorite social media site to inspire others. Browse the rest of the blog for additional free patterns to build your library.