Easy Pompom Gnome Crochet Pattern: A Step-by-Step Guide
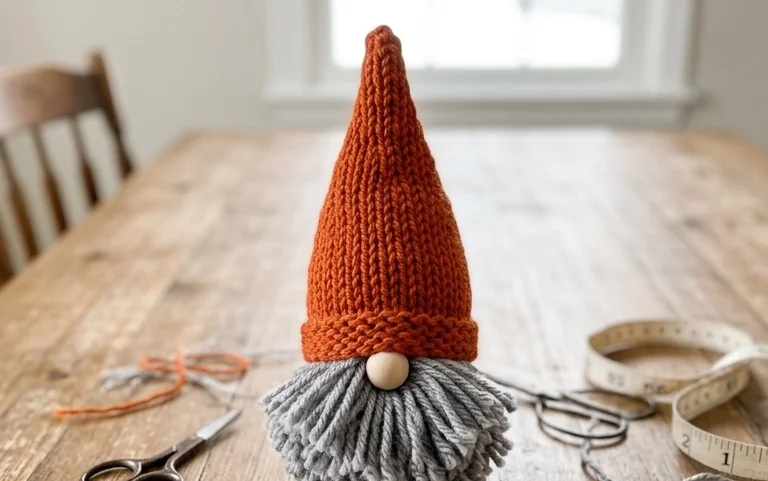
A tiny hat covering a hidden wooden nose gives this handmade character a whimsical look that sits nicely on a bookshelf or desk. This project uses leftover worsted yarn and a simple single crochet technique to create a sturdy, round base that holds its shape without any sagging. It suits beginners who want to practice maintaining even tension, as the continuous spiral construction avoids awkward seam lines entirely. You will learn to work in the round to shape the gnome’s body, providing a quick, satisfying result that makes a thoughtful gift for neighbors or friends during the busy holiday season.
Why This Project Is Worth Making
This beginner-friendly project works up in a single sitting, making it an ideal choice for using up leftover yarn scraps from larger blanket or garment projects. Because it relies on basic single crochet stitches, you can focus on mastering your tension without the stress of complex stitch patterns or constant counting. The resulting item provides a dense, sturdy texture that holds its shape well, which is perfect for functional accessories or small gifts. Most crocheters find the rhythmic, continuous round construction incredibly soothing for an evening of stress-free crafting.
I managed to finish this in just over an hour while watching a movie. The instructions were very easy to follow, and it turned out exactly the size I needed for a last-minute birthday gift.
— Sarah, hobbyist crocheter
Pattern Overview & Skill Level
- Skill Level: Beginner
- Approximate Time: 60 to 90 minutes
- Construction: Amigurumi-style continuous rounds worked in a spiral
- Finished Dimensions: 4 inches wide by 4 inches tall
Materials & Supplies Needed
- Yarn: Worsted weight (#4), 100% cotton yarn (approx. 40 yards). Cotton is preferred for its lack of stretch and clear stitch definition.
- Hook Size: 4.0 mm (US G-6) to ensure a tight, professional-looking fabric that prevents stuffing from showing through.
- Notions: Fiberfill stuffing, yarn needle, locking stitch marker, and scissors.
- Yarn Substitutions: Acrylic worsted weight can be used as a cheaper alternative, though it will feel softer and slightly squishier than cotton.
Stitch Guide & Abbreviations (US Terms)
- ch: chain
- sc: single crochet
- inc: 2 sc in the same stitch
- dec: single crochet two stitches together (insert hook in front loop of next two stitches, yarn over, pull through, yarn over and pull through both loops on hook)
- sl st: slip stitch
- MR: magic ring
- st(s): stitch(es)
Step-by-Step Pattern Instructions
Body
Work in a continuous spiral without joining rounds. Use a stitch marker to keep track of the first stitch of every round.
- Rnd 1: Start 6 sc in a MR (6 sts)
- Rnd 2: Inc in each st around (12 sts)
- Rnd 3: (Sc in next st, inc in next) 6 times (18 sts)
- Rnd 4: (Sc in next 2 sts, inc in next) 6 times (24 sts)
- Rnd 5: (Sc in next 3 sts, inc in next) 6 times (30 sts)
- Rnds 6-12: Sc in each st around (30 sts)
- Rnd 13: (Sc in next 3 sts, dec) 6 times (24 sts)
- Rnd 14: (Sc in next 2 sts, dec) 6 times (18 sts). Begin stuffing the body firmly with fiberfill at this stage.
- Rnd 15: (Sc in next st, dec) 6 times (12 sts)
- Rnd 16: Dec 6 times (6 sts)
Finishing
Cut the yarn leaving a 6-inch tail. Thread the tail onto your yarn needle and weave it through the front loops of the remaining 6 stitches. Pull the thread tight to cinch the opening closed. Secure the end with a small knot and hide the tail inside the body.
Care & Washing Instructions
- Machine wash your item in a mesh laundry bag using a gentle cycle and cool water.
- Reshape the item while it is still damp to ensure it retains its intended dimensions.
- Lay the piece flat on a towel in a shaded area to air dry completely.
Pro Tips & Common Mistakes to Avoid
- Always place a stitch marker in the first stitch of every round. Losing your place in a continuous spiral makes it nearly impossible to keep your stitch counts accurate.
- Keep your tension tight. If you see large gaps between your stitches where the stuffing shows through, try switching to a hook one size smaller than recommended.
- When weaving in ends, pass the needle through the center of the stuffing rather than across the surface. This hides the tail more effectively and prevents it from working its way back out.
- To increase the size of the project, add more rounds of increases (e.g., Rnd 6: Sc in 4, inc) before working the even-height rounds. Note that increasing the diameter will require roughly 20% more yarn for every two additional rounds.
Frequently Asked Questions
Can I use a larger hook size for this project?
Using a larger hook will result in a larger, looser-textured item. If you increase the hook size, ensure your stitches are still tight enough that the stuffing does not poke through the fabric.
Is it okay to use wool yarn instead of cotton?
Wool works, but keep in mind that it has more natural stretch than cotton. Your final project might be slightly larger and softer, and it may not hold its structural shape as firmly as a cotton version.
How do I know if my stitch count is correct?
Count your stitches at the end of every round before moving to the next. If your count is off, it is easier to undo one round than to try and compensate for missing or extra stitches later.
Can I sell the items I make from this pattern?
You are welcome to sell finished items created from this pattern. I only ask that you credit the original pattern design in your product descriptions.
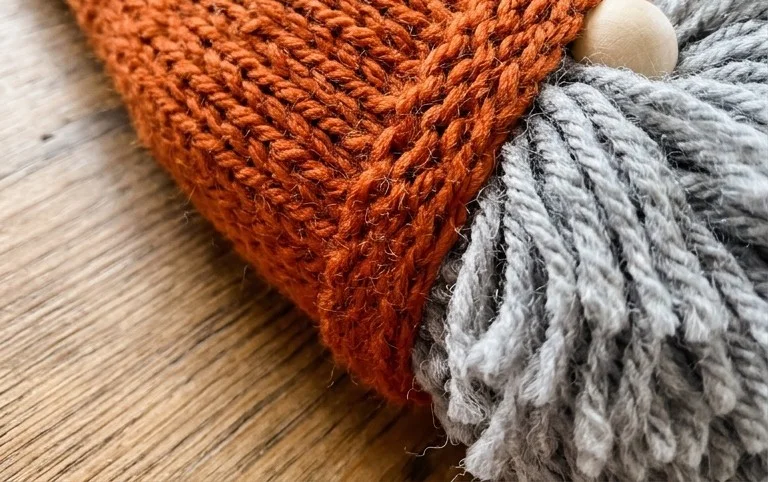
Your new yarn gnome looks great standing guard on a fireplace mantel or perched near a potted plant. Try using variegated yarn to give the hat a striped appearance or scale up the hook size if you want a larger, cuddlier version for a nursery shelf. Sharing a photo of your finished work online helps others find inspiration for their own yarn stash projects. Browse the rest of the blog for more simple, beginner-friendly patterns to build your collection of handmade home decorations and gifts.