How to Crochet a Perfect Bullion Stitch: Easy Tutorial
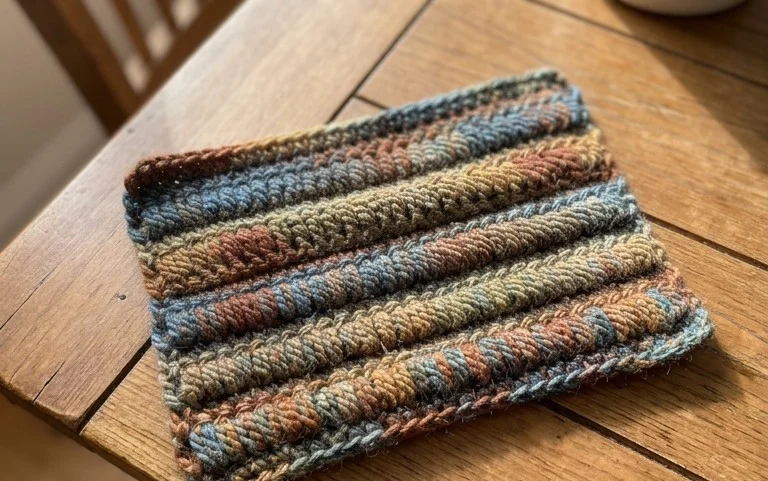
The bullion stitch creates a dense, coiled texture that looks like a row of small, uniform barrels. It adds a luxurious weight to your projects and works wonders when used to create raised surface details or a standalone floral motif. Beginners often find this stitch intimidating because of the yarn wrapping, but mastering the tension allows the coils to sit flat without distorting your work. This project focuses on rhythmic wrapping techniques that ensure each stitch looks crisp and professional. Whether you want to add character to a simple headband or build a decorative border, learning these loops brings a refined finish to every handmade item.
Why You’ll Love This Pattern
This simple crochet drawstring pouch relies on basic stitches to create a dense, durable fabric that keeps small items secure. It works up in under two hours, making it an excellent choice for last-minute gifts or stash-busting projects using leftover cotton yarn. The construction involves a flat circular base that transitions into a sturdy, upright body, ensuring the pouch holds its shape even when empty. You can easily adjust the size by increasing the rounds of the base or adding more height to the body, offering flexibility for different uses like storing stitch markers, jewelry, or earbuds.
I managed to finish this pouch in a single afternoon using scraps from my last sweater project. It is sturdy enough to hold all my loose change and fits perfectly in my purse.
— Sarah, intermediate crocheter
Pattern Overview & Skill Level
- Skill Level: Beginner
- Approximate Time: 1.5 to 2 hours
- Construction: Worked in continuous rounds from the bottom up, with a simple ch-space row for the drawstring
- Finished Dimensions: 4 inches wide by 5 inches tall when laid flat
Materials & Supplies Needed
- Yarn: Worsted weight (#4), 100% cotton, approximately 60 yards. Cotton is preferred for its lack of stretch and structured finish.
- Hook Size: 4.5 mm (US G-7) to create a tight gauge that prevents small items from slipping out.
- Notions: Tapestry needle for weaving in ends, a locking stitch marker to track the start of rounds, and a length of scrap yarn or cord for the drawstring.
- Safe yarn substitutions: Acrylic yarn may be substituted but will result in a slightly softer, less structured pouch. Wool can be used but will require hand washing to prevent unintentional felting.
Stitch Guide & Abbreviations (US Terms)
- MR: Magic Ring (or ch 3, join with sl st to first ch to form a loop)
- ch: Chain
- st(s): Stitch(es)
- sc: Single crochet
- inc: Increase (2 sc in the same stitch)
- sl st: Slip stitch
- BLO: Back loop only; insert hook only into the back loop of the stitch instead of both loops
Step-by-Step Pattern Instructions
Base
- Rnd 1: Work 6 sc into a MR (6 sts).
- Rnd 2: Inc in each st around (12 sts).
- Rnd 3: (1 sc, inc) repeat 6 times (18 sts).
- Rnd 4: (2 sc, inc) repeat 6 times (24 sts).
- Rnd 5: (3 sc, inc) repeat 6 times (30 sts).
Body
- Rnd 6: Working in BLO, sc in each st around (30 sts).
- Rnd 7-18: Working through both loops, sc in each st around (30 sts).
- Rnd 19 (Eyelet Row): ch 2, skip 1 st, sc in next st repeat 15 times (30 sts including ch-spaces).
- Rnd 20: Sc in each sc and ch-space around (30 sts).
- Finishing: Sl st in next 2 sts to smooth out the edge, cut yarn, and fasten off.
Assembly
Thread a length of cord or yarn through the spaces created in Rnd 19. Start by weaving the cord in and out of the chain spaces. Secure the ends with a knot or a small bead to prevent the drawstring from pulling through. Weave in all loose yarn tails inside the pouch using a tapestry needle to ensure they stay hidden during daily use.
Care & Washing Instructions
- Hand wash in cool water with a mild detergent to maintain the integrity of the cotton fibers.
- Lay flat on a clean towel to air dry, reshaping the pouch while damp to ensure the base remains flat.
- Avoid using bleach or tumble drying, as high heat can shrink the cotton and distort the shape of the bag.
Pro Tips & Common Mistakes to Avoid
- Tension: Keep your tension tight throughout the project. If you notice large gaps between your stitches, consider going down one hook size to ensure the pouch fabric remains dense.
- Stitch Counting: Always place a stitch marker in the first stitch of every round. It is easy to lose track of the count in continuous rounds, which can result in an uneven top edge.
- Weaving Ends: Secure your ends by weaving them back and forth in different directions through the BLO ridge inside the base to keep them from working loose.
- Size Adjustments: To make the pouch larger, continue adding increase rounds to the base before starting Rnd 6. Remember that for every 6 stitches you add to your base diameter, you will need to add more yarn to your project.
Frequently Asked Questions
Can I use a larger hook for this pattern?
Using a larger hook will result in a looser, airier fabric. This may cause the contents of the pouch to poke through the stitches, so it is recommended to stick to the suggested hook size or smaller.
Is this pattern suitable for beginners?
Yes, this project only requires knowledge of single crochet and increases. It is a great way to practice working in continuous rounds without needing complex stitch patterns.
How do I adjust the height of the pouch?
Simply add or subtract rows between Rnd 7 and Rnd 18. Each extra round will add approximately one-quarter inch to the height of the finished pouch.
Am I allowed to sell pouches made from this pattern?
You are welcome to sell finished items created from this pattern. Please credit the design to this tutorial whenever possible, but do not resell, copy, or redistribute the written instructions themselves.
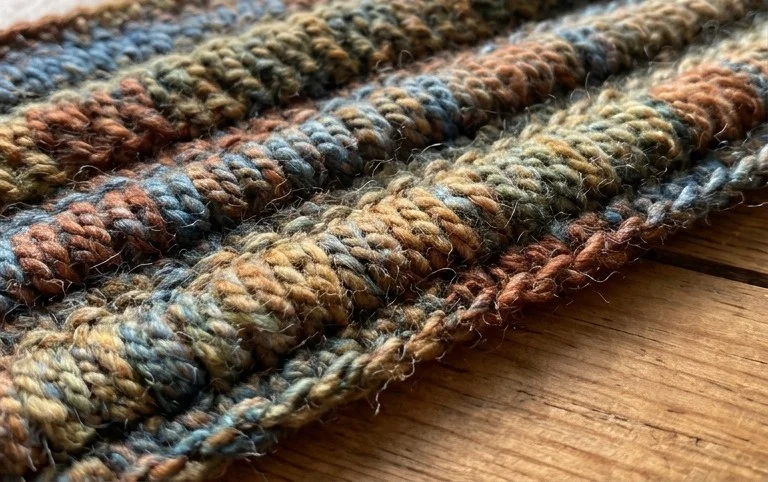
You have finished a beautiful piece that highlights the charm of coiled textures and solid construction. Try working this stitch in a variegated wool blend if you want to emphasize the round shape of the bullion loops or adjust the number of wraps to create thinner, tighter rows for a sleeker look. Posting a picture of your finished work helps other makers see how different colors behave with this technique. Check out the rest of the pattern archive for more ideas to keep your hands busy throughout the season.